![]() This post is part of the Pentaho Sparkl application builder tutorial. As my habitude the tutorial is described as a “step by step” list of tasks and commands, in my opinion more useful and clear to understand how to do and make it work.
This post is part of the Pentaho Sparkl application builder tutorial. As my habitude the tutorial is described as a “step by step” list of tasks and commands, in my opinion more useful and clear to understand how to do and make it work.
This first post is partially a duplication of the very first post from Pedro Alves, announcing the release of the tool. The tutorial is developed using a Linux Ubuntu 12.04 LTS operating system, but even on a different platform the description should be valid and help to understand how to reach the goal.
Prerequisites
Before starting to work on your first Pentaho application, Pentaho Business Analytics Platform 5 should be installed on your system. If you don’t have it installed and you don’t know how to install it, please follow this tutorial.
Installing Sparkl
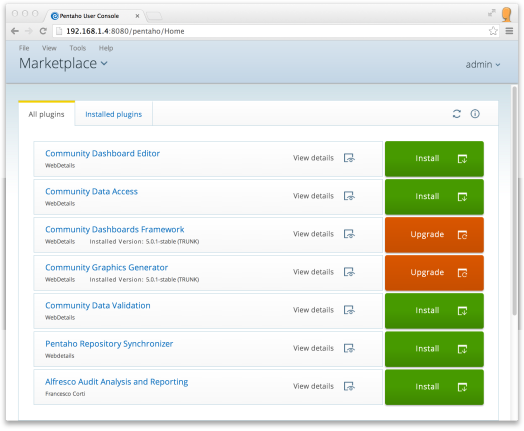
Installing Sparkl is very straightforward because is done using the official Pentaho Marketplace. To do this, simply access to Pentaho User Console as administrator (otherwise you will not have permits to access to it) and click on Home -> Marketplace.
- Community Data Access
- Community Dashboard Editor
- Sparkl
Restart the Pentaho BIServer using the ‘stop-pentaho’ and ‘start-pentaho’ scripts in that order (you can find them in the ‘biserver-ce’ folder).
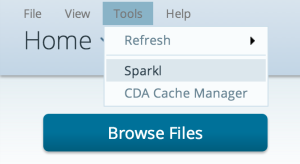
Access to Pentaho User Console as administrator again and access to Sparkl using the menu described below.
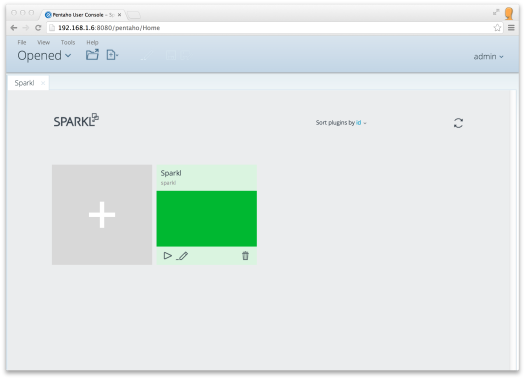
What you get is something similar to the picture below.
Creating your first Pentaho application
Probably the creation of a Pentaho application with Sparkl is simpler than its installation. From the Sparkl desktop, click on the big plus to create a new one. What you get is a form that requests the form ID to digit (in our case ‘myFirstApplication’) and the ‘create’ button to press. After pressing it, restart the Pentaho BIServer using the ‘stop-pentaho’ and ‘start-pentaho’ scripts (you can find them in the ‘biserver-ce’ folder). That’s all!
Accessing to the Pentaho User Console, the tools menu has changed in the way is described below.
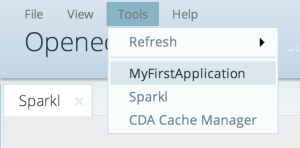 The MyFirstApplication item will let your users to access to the default dashboard of your application. Since that moment, if you click on the item, you receive a Pentaho error describing that no resources are available for the request.
Customizing the Pentaho application
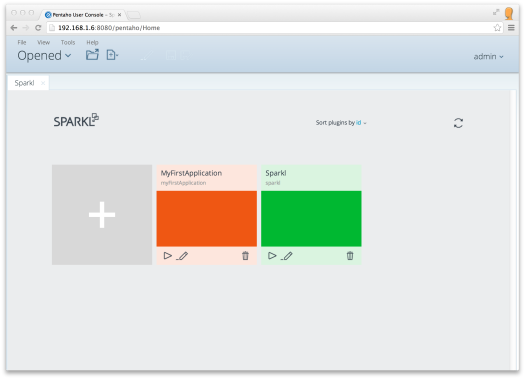
After the creation it’s time to define the application details. To do this, access again the Sparkl desktop that now should be similar to the image below.
Press the edit icon and fill in the fields you find in the form. After everything is complete, press the ‘submit changes’ button.
Congratulations, you have created your first Pentaho application with Sparkl.
Technical details
To dive deep in the technical development, if you want to touch with your hands how the application is set, take a look at the folder described below. All the Sparkl application is stored there. 😉
<biserver-ce>/pentaho-solutions/system/myFirstApplication
Conclusion
In this tutorial we have seen how to install Sparkl and create your first Pentaho application with it. To get more tutorials on that topic, you can see the menu list in this page.

Hi! I did everything like in post, but I don’t see any “big plus”, I see nothing. What kind of problem can it be? Here is the link ti screenshot https://www.dropbox.com/s/vlmrvtmae78i5au/bi.png?dl=0